Sarah Williams
- Spoeks

- 4 jun 2024
- 7 minuten om te lezen
Welcome back to my blog! Today, I'm thrilled to revisit one of my favorite cosplay projects from 2018: Sarah Williams from the movie "Labyrinth." Even though it's been six years, I still consider this dress to be one of the most beautiful pieces I've ever created.
Before we dive into the tutorial, I want to give you a heads up: while this post will cover a lot of the process, some parts of the tutorial are exclusive to my Ko-fi supporters. A Ko-fi donation costs just 1 euro, and it's a one-time payment. To access the exclusive content, you’ll need to have an Instagram account and provide your username when you donate. This is because the additional content is available to my 'close friends' on Instagram, a list that includes only those who have supported me on Ko-fi.
But without further ado, let's start with the free part of this tutorial!

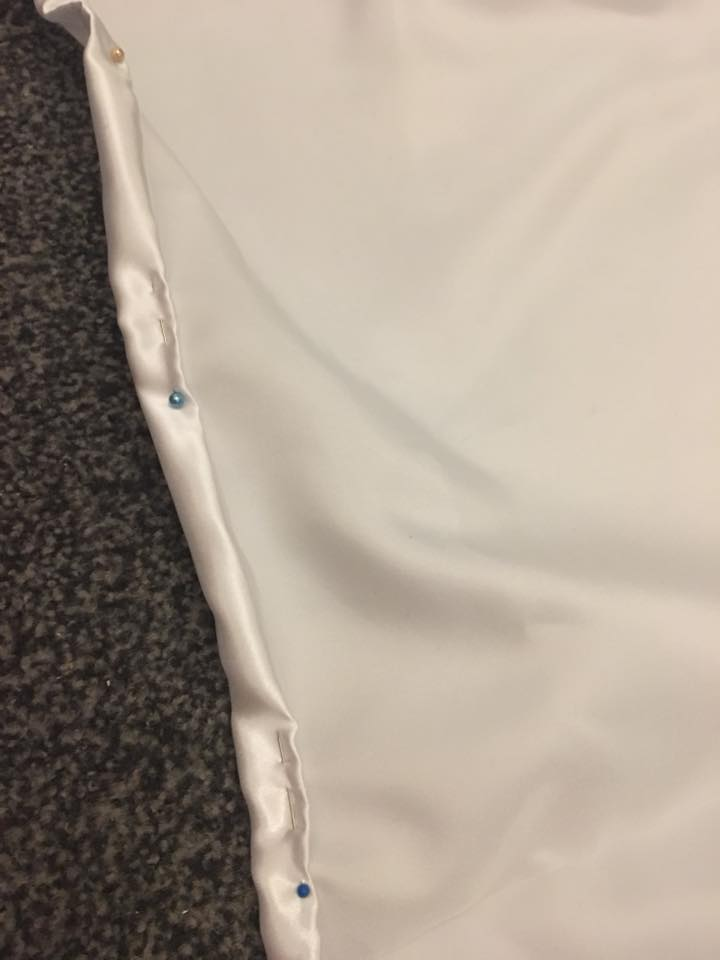
So, let's start with the skirt! To create the skirt, I used 4 pannels of each fabric type. For the satin base these pannels have the dimension of the full width of the fabric x the desired lenght of the skirt. In my case this had lead to a base layer of 6x1 meters in total. And then roll the edges twice to create a nice hem to finish it off.

Then you also start to hem the other layers of this skirt. I will list all fabrics and their dimensions later in this blog for a total overview. I don't think anybody enjoys hemming, and you need to do lots of it for this cosplay.. But don't get demotivated and believe me when I say it will all be worth it in the end!

And then I started pleating the organza so it has the same with as the satin base layer (so a width of 6 meters).


As a lover of voluminous gowns, I didn't stop at just a single layer of satin and organza for my Sarah Williams cosplay. To achieve the fullness and richness I envisioned, I sewed multiple layers of fabric, each adding to the dress's grandeur.
Here's a breakdown of the layers I've used so far (from bottom to top):
6x1 meters of satin
6x1 meters of iridescent organza
6x1 meters of white organza
7x1 meters of white sparkling tulle
7x1 meters of lace
9x1 meters of iridescent organza
9x1 meters of white organza At a later stage I also added another layer of fabric. In the summer of 2020 I found a great semi transparant wrinkled/pleated fabric at a market, wich I used as the final top layer. But since this was 2 years later, I have unfortunately lost the photo of this process. But I think It was around 10 or 11 meters by 1 meter.
Why So Many Layers?
I have used more fabric than is strictly necessary, but that's a deliberate choice. The more fabric you incorporate, the fuller and more opulent the skirt becomes. Since this is a ballgown, I wanted to ensure it had a truly majestic fullness. BUT I should mention that this dress is very heavy because of it. So I urge you to think about what's more important to you when you make this cosplay: the look, or the weight.

Now that the skirt layers are complete, it's time to attach the waistband. For my Sarah Williams cosplay, I opted for a tunnel waistband to accommodate an elastic band, providing flexibility and a snug fit. Here’s how I did it:
Materials Needed:
Satin fabric (for the waistband)
Elastic band
Needle and strong thread (for hand sewing)
Step-by-Step Guide:
Creating the Waistband:
Cut the Satin: Cut a strip of satin fabric long enough to wrap around your waist, plus a few extra inches for seam allowances. The width should be twice the desired width of your final waistband plus an extra inch for seam allowance.
Fold and Press: Fold the satin strip in half lengthwise, with the right sides facing out. Press the fold to create a crisp edge.
Sewing the Waistband to the Skirt:
Pin the Waistband: Align the raw edges of the folded satin strip with the top edge of the skirt. Pin them together, ensuring that the satin strip evenly covers the circumference of the skirt.
Hand Sew: Since the fabric layers are too thick for the machine, hand sew the waistband to the skirt using a strong backstitch. Ensure your stitches are tight and secure to hold the weight of the skirt.
Creating the Tunnel:
Sew the Sides: Once the waistband is attached to the skirt, sew the ends of the waistband together to form a continuous loop. Leave a small gap (about 1-2 inches) to insert the elastic band.
Insert the Elastic: Attach a safety pin to one end of the elastic band and thread it through the tunnel. Once the elastic is fully threaded, sew the ends of the elastic together securely.
Close the Gap: Hand sew the small gap in the waistband to complete the tunnel.
Alternative Methods:
Direct Elastic Band: If you prefer a simpler method, you can sew an elastic band directly to the top edge of the skirt. This eliminates the need for a tunnel but may not provide as polished a look.
Zipper Option: If you opt for a zipper instead of an elastic waistband, sew the waistband as a single layer (not a tunnel), and attach the zipper to the side or back of the skirt.
Why Hand Sewing?
The multiple layers of fabric make the waistband too thick for a standard sewing machine. Hand sewing provides greater control and ensures that the stitches are secure and won't break under the weight of the skirt.

Lift up the top layer of fabric on the left front side (when wearing)/right front side (when looking at it) to create a drape, as pictured in the photo above. Then handsew this drape in place.

Adding the final decorative touches can really bring your cosplay to life. For the Sarah Williams costume, I decided to include a sew on gem to enhance the brooch on the skirt. Since the gem on the skirt booche is a bit of a dull golden colour, I had painted one of the gems with a mixture of gold acrylic paint and a little bit of water.


Then I pulled some floral wire through the holes of the gem. It doesn't has to be floral wire, as long as it's a thin type of wire, that is also easy to bend, it will work fine. On the left photo you'll see how this looks from above, while the photo on the right gives you a look at the backside view.


I have bought multiple different kinds of beads. These are the same beads as the ones i’ll use on the bodice.
I pulled the beads through the wire and kept bending the wire into shape. This is also why it's important that you use a very thin wire, otherwise you'll not be able to decorate them with the beads. After crafting for a while, I finished making the skirt brooche, as seen on the right photo. You can now sew it onto the 'drape' on the skirt. To create the necklace, you'll use the exact same techniques and materials. I unfortunaly do not have any photos of the necklaces making process anymore.

For the bodice, I used the simplicity Cinderella live action pattern, but I added some sleeve straps to it. The lining consists of 2 layers of cotton, rigilene boning, and piping. I was also supposed to add a lace trim in there, but i forgot so i added that in later.

The outer layer, aka the fashion layer, is made with an interfacing, satin, lace fabric, and organza. Then I decorated it with beads. I tried to add as many beads before sewing the outerfabric and the innerfabric together to make the inside look as clean as possible.


Then I also started making the sleeves. More information about the sleeves is available for my Ko-fi supporters in the highlights of my instagram profile. If you do want the extra info (and acces to the other exclusive content), here is a link to my kofi: https://ko-fi.com/spoeks please remember that you do need an instagram account and leave your username with the donation to gain acces to them!

Sometimes in the process of creating a cosplay, small steps can be missed. I was supposed to add a lace trim to the innerfabrics on the bodice, but I had forgotten to do so. Fortunately, adding lace trim to the neckline can still be achieved with some careful handsewing. Be carefull to only sew the lace to the lining, so the stichtes won't be visible from the outside.
And that wraps up the free part of this tutorial! I hope you found it helpful and interesting. For those looking to dive deeper into the details of my cosplay process, there's an opportunity to access exclusive content by supporting me on Ko-Fi.
Access Exclusive Content:
For just 1 euro (a one-time payment), you can gain access to additional tutorials and detailed process content. Here’s how:
Donate on Ko-Fi:
Visit my Ko-Fi page and make a one-time donation of 1 euro.
Provide Your Instagram Username:
After donating, leave your Instagram username in the message box.
Follow My Instagram Handles:
@spoeks: Access exclusive content about the remade bodice of my Sarah Williams cosplay and the Anastasia transformation dress.
@spoeksy: Get extra info on making other intricate costumes such as Glinda, Ariel's "Kiss the Girl" dress, Rapunzel, and historical pieces like an Edwardian bust improver (even though I haven’t made an Edwardian dress yet!) and a corded petticoat.
By supporting me, you’ll join my 'close friends' list on Instagram, where I share detailed step-by-step guides, tips, and insights into my cosplay creations.
Thank you for following along with this tutorial. Your support means the world to me and helps me continue creating and sharing my passion for cosplay.
Happy crafting!
Opmerkingen