Tokyo Mew Mew Maid uniform tutorial
- Spoeks

- 20 jan 2025
- 9 minuten om te lezen
It’s been quite a while since I last wrote a tutorial blog post (about a month), but it’s been even longer since I made this cosplay—two years now! 😲 So, I think it’s about time I share how I created my Berry Shirayuki cosplay from Tokyo Mew Mew à la Mode.
Specifically, this is her maid outfit since her magical girl outfit is still on my wishlist! 😊 I also have a feeling this will be the year I finally wear it for real. So far, I’ve only tried it on once—just to make sure it fit after I finished making it. 😅

So, now that you know what cosplay this post is about, let's get started with the process!

For the base of this cosplay, I used the NewLook 6299 pattern, but only for the bodice. I made several modifications to create the correct silhouette for my cosplay.
First, I shortened the pattern so it stops just below my waist. Then, I replaced the original sleeves from the pattern with puffed sleeves, and I added a pleated circle skirt to give the outfit loads of volume.

Once I traced the pattern onto pattern paper (I never cut directly into the fabric because I like to reuse patterns for other projects or make adjustments later—especially if my weight changes), I cut out the fabric pieces. For this cosplay, I used a basic cotton fabric.

I started by sewing lace onto the right side of the collar piece, which I had strengthened with Vlieseline. Then, I placed another piece of the collar on top, with the right sides together, and stitched them together. After turning it inside out, the lace sticks out neatly between the two fabric layers. This method is similar to how you would add piping to a piece of clothing.

In a similar fashion, I used a long stitch to attach lace to the front strip. Then, I sewed another piece of white cotton on top, with the right sides together. After stitching, I turned it inside out. Again, the lace should be nicely sandwiched between the side seams.

Next, using a small stitch, I attached the strip to the center of the front piece of the bodice.

Once all the bodice pieces are sewn together, it’s time to add an invisible zipper (or any other closure system you prefer). If you’re not familiar with sewing invisible zippers yet, there are plenty of excellent tutorials on YouTube to guide you! 😊

Here’s what the invisible zipper looks like when it’s closed. This was my second attempt at sewing one, and I’m really pleased with how it turned out!

It seems to fit well! I actually find it a plus that it’s slightly bigger on me, as it makes dressing easier once the skirt is on and adds extra comfort. Plus, since I’ll be wearing an apron, there's no need for it to be skin-tight. I unfortunally forgot to take photos of the sleeve process.. So we go on to the skirt next!

For the skirt, I made a circle skirt, but I made my waist radius as large as possible to leave room for pleats later. You could make a basic rectangle pleated skirt if you're trying to save fabric, but personally, I love the extreme volume that a pleated circle skirt provides. It’s truly perfect for princesses and magical girls.
After cutting the fabric, I let it hang for 3 days. This is because a circle skirt is partly cut on the bias, which can cause it to stretch over time. By waiting before sewing, I prevent an uneven skirt later on, saving me from needing to make alterations down the line.

After a couple of days, remove the skirt from hanging and check for any areas that may have stretched out. If needed, make adjustments to even it out. I had to trim some fabric in a few spots because the lenght had become uneven.

I added a small strip of horsehair braid, though you could also use a wider one, depending on your personal preference or what you have in your stash. It serves two functions:
It adds structure, volume and bounce to the skirt.
It provides an easy way to finish the edges neatly.

Sew the bottom of the horsehair braid to the right side of the fabric.

Next, turn the horsehair braid to the inside and sew the hem in place.


I’m going to make my own bias tape—please ignore the lines on the first photo, as they were completely wrong! 😅 I had to wash the chalk out and start over. If you're not sure on how to make your own biaistape, please look up a tutorial for this, for example on pinterest. The reason I’m making my own bias tape is so I can use the exact same fabric for the trim on the skirt, bow, and sleeves. This way, I’ll have matching finished edges.

Once the bias tape is ready, attach it to the skirt to create that decorative line.

The next step was making pleats at the waist of the skirt.

After sewing in the pleats, I finished the edges of the skirt at the waist using my serger.

I used an iron to press the pleats into place (and it also helps removing the wrinkles that might have occured while making the skirt).

And then I sewed the skirt to the bodice. I also inserted the sleeves but as mentioned before, I forgot to take pictures of that.
We're getting somewhere! But it still looks incomplete right?
So let's get on making the apron and headband. They are so cute after all!

For the gathered shoulder strap, I cut out a rectangle of cotton that’s about twice the width and twice the length of the finished strap. I’ll attach a small strip of horsehair braid to the middle, securing it with just a few hand stitches. A full stitch would be too visible, and a few stitches are enough to hold it in place.


Fold the fabric over along the width, then start gathering the length. This will give you the desired size for the shoulder strap.

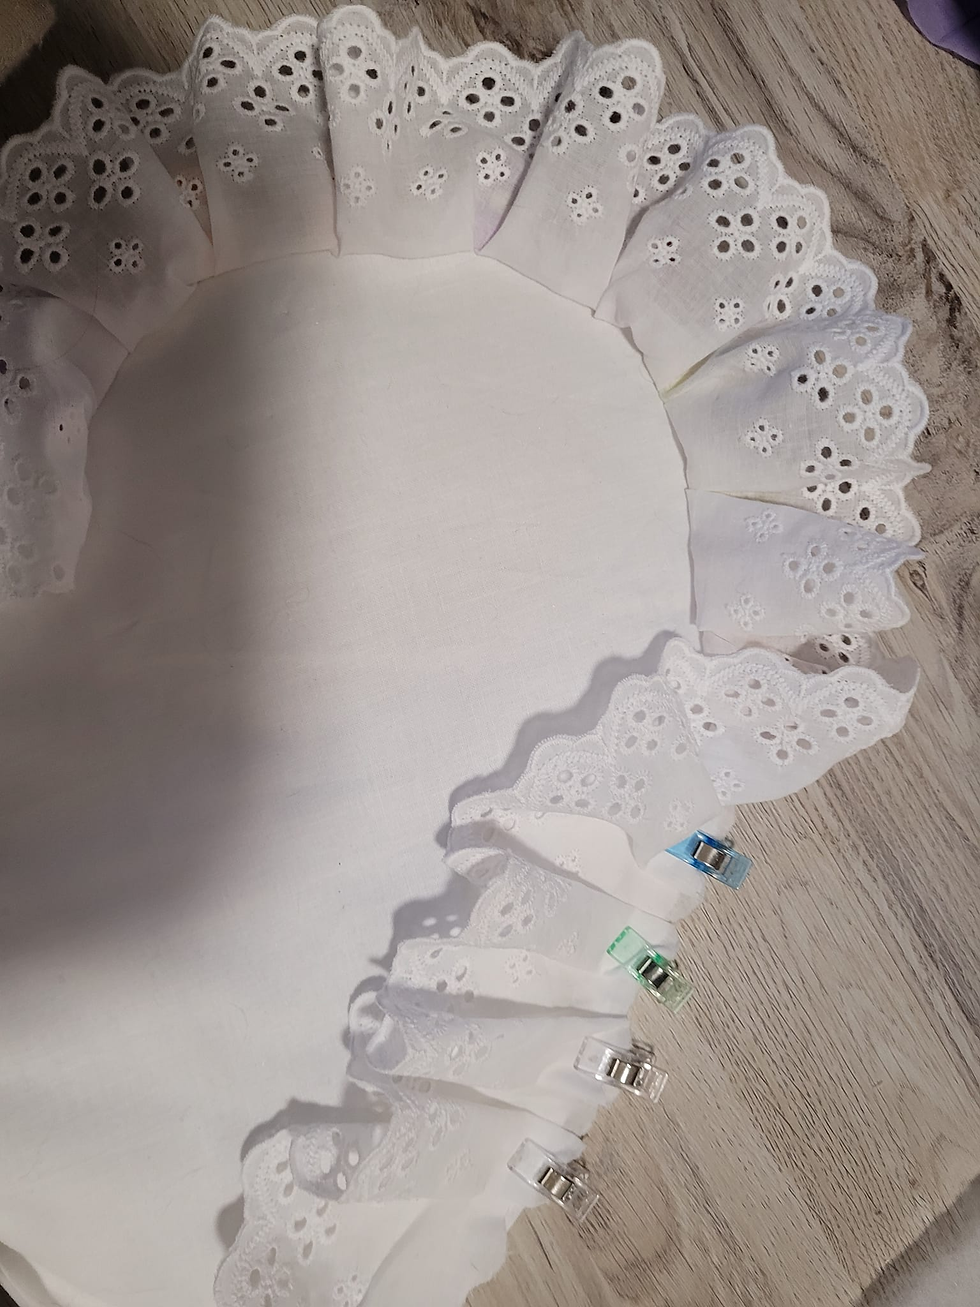
Gather some cotton lace and attach it to the gathered band.


Lay the gathered shoulder strap on top of one of your ‘normal’ shoulder straps. Then, place the other ‘normal’ shoulder strap on top of that, sandwiching the gathered piece between the two. Sew along the raw edge (the side that isn’t folded) to secure everything in place.

Fold the ‘normal’ shoulder straps to the right sides and press them down. The picture above shows what it should look like. Now, the gathered pieces are sandwiched within the seam of the shoulder straps.

On the inside, trim any excess fabric to prevent bulk.

Attach the shoulder straps to the front piece. The front piece consists of two rectangles, one of which has been reinforced with interfacing. Unfortunately, I can’t find the photos of this step, sorry! But basically, you’ll attach the outer fabric together first, then the lining, ensuring everything is neatly finished.

Then handsew the shoulderstraps together with a ladder stitch. This will make sure you will not have any visible stitches on the outside, wich is super pretty!

Next, hand-sew everything to the lining of the waistband, making sure there are no visible stitches on the outside. Unfortunately, I can’t find the photos of making the waistband, but it’s just two straps (one for the outside and one for the lining), each the length of your waist and the desired width.

I drew a heart on paper to test out what it could look like, but I’m not happy with how it looks on this dress. So, I’m going to make some markings and notes on it, which I’ll use as guidelines to draft a new heart design.

Once you have a heart shape you like, cut out (2 or) 3 pieces of cotton and 1 or 2 pieces of fiberfill, depending on how much volume you want to add.

I chose to cut 2 pieces of fiberfill, with one being slightly smaller than the other. Lay the fiberfill pieces on top of one of the cotton heart pieces.

Top it off with the second cotton heart piece.

Sew the pieces together using a long stitch.
Add your (cotton) lace trim. You can either gather or pleat it, depending on your preference.

Next, cut out a cotton piece with the height of your heart plus a little extra, and about twice the width (or more).

Gather (or pleat) the rectangle piece to your liking, making sure it’s no smaller than your heart. Then, attach it to your third heart piece, if you’ve cut out 3 pieces like I did, or to the heart pillow you just created, if you’ve cut out 2 pieces.

Cut off the excess fabric from the pleated piece, following the heart shape you’ve sewn it onto as a guide.

Sew all the heart pieces together, right sides facing together, BUT leave an opening to turn it inside out later.

Turn the heart right side out (as it was technically inside out before). Then, hand sew the opening closed using a ladder stitch for an nice, invisible finish.

I’m going to make the bow for the back of the apron. One of the pieces is reinforced with Vlieseline. Unfortunately, I forgot to photograph the bow-making process, but it’s super easy—there are plenty of tutorials available, even on my Facebook page!


For the long piece hanging from the bow (I'm not sure what to call it—maybe a bow tail?), I cut 3 pieces: one the full length, and two that are just over half the length. Attach them like this, but don’t close the entire middle. You’ll use this middle opening to turn it inside out later.

Turn it right side out using the opening.

Finish off the middle part by turning the hem to the inside and using a zig-zag stitch to sew it down.

Pull the bow tail through the middle part of the bow.

Hand-sew the heart to the waistband, stitching on the inside so it remains invisible from the outside.
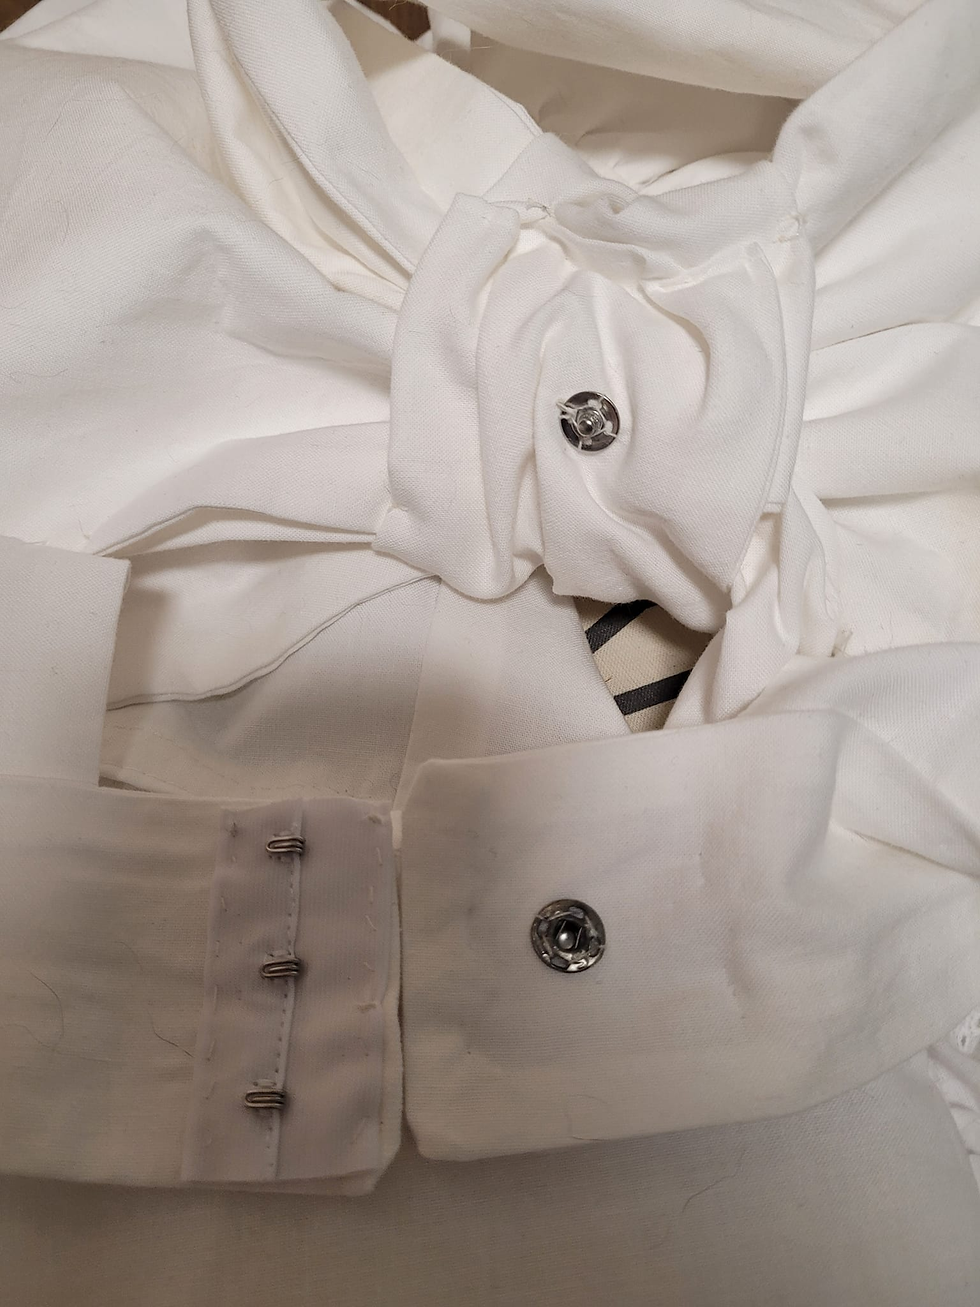
Attach a button to the back of the waistband and the backside of the ribbon, so you can secure the ribbon to the back. If you prefer another method, feel free to use that. I chose a button because it doesn’t get in the way when closing the waistband.

I took a piece of fabric and, using a disappearing ink pen, marked the outline of the headband. I also marked where the decorative part would go. Originally, I planned to lay a ribbon on it, but I decided instead to stitch over the marks with pink thread, creating the illusion of very small embroidery.

Next, lay another layer of fabric underneath, which has been interfaced with Vlieseline. Sew the layers right sides together, following the outlined markings.

Cut out the shape from the fabric.

Cut out a layer of thicker cotton fabric (like canvas or jeans), and use a zigzag stitch to attach floral wire to it.

Insert the piece with the wire between the headband layers.

Finish off the seams and handsew close with a ladder stitch.

In the manga (top picture) and the new Tokyo Mew Mew anime (middle picture), the headpieces have little bows attached to them. However, in the classic anime (bottom picture), they don’t seem to have those bows. It’s up to you whether or not you want to add them. Personally, I’ll be adding them ,I think they’re cute. And since Berry only appeared in the manga and not the anime, I feel it’s fitting!

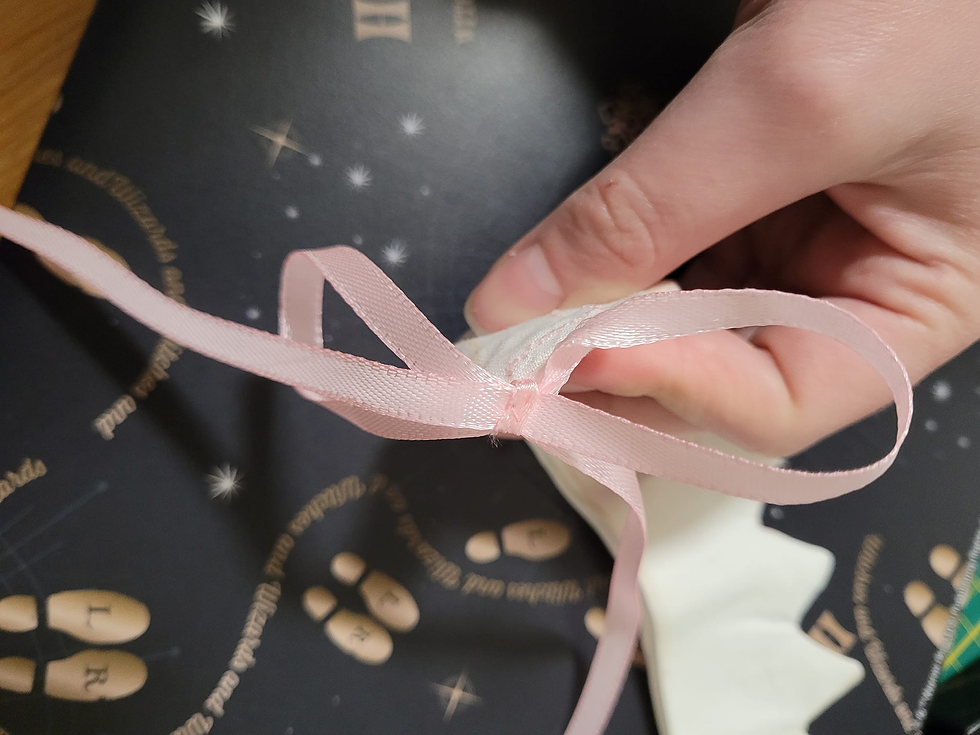
Cut 2 pieces of ribbon and tie them into small bows

Hand-sew something to secure the headpiece to your hair or wig. I used these, but you can also attach an elastic, a headband, loops for bobby pins, or whatever works best for you.
Next, hand-sew the ribbon bows to the headpiece.

Wait a couple of days for the ink to dissapear. Right now it's still visible as you can tell.

Cut out the pattern pieces for the bloomers. I used Simplicity 1139 and simply shortened them a lot.

Sew the (cotton) lace to the bottom of the bloomers, again: I gathered them a bit.

Press the seam.

Sew the top lace with the small openings onto the bloomers.

Sew the pieces together and attach a waistband. I used an elastic band, but you can also go for the more historical method and use the waistband from the pattern.
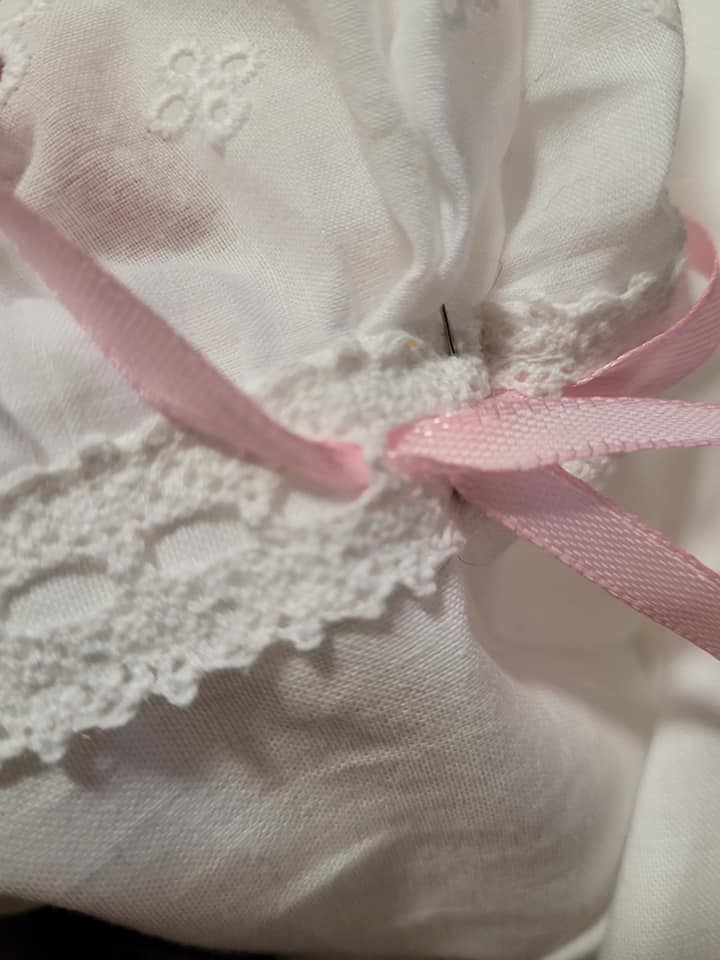
Pull a ribbon through the loops of the top lace. This actually took me hours—didn’t expect that! xD


Then, try it on to see if it fits and how it looks on you! Of course, this exact tutorial can be used for any of the Mew Mew girls—just choose different fabric colors and a different wig, and you’re ready to go!

This might give you an idea how it could look like for Ichigo, Mint(o), Lettuce, Pudding, Zakuro or Ringo! :)
This cosplay was loads of fun to make, and despite that it was pretty simple I still learned a lot from it. I made it for a group, but the group got discountinued so I never got to wear it so far, but this year I also have an anime themed convention planned.. So if she still fits (wich I think she should), I will finally give her her time to shine! Anyway, I hope you found this tutorial usefull, and you will have as much fun making this dress as I did. Happy sewing and good luck!
Opmerkingen