Cosette part 2 - the bonnet
- Spoeks

- 22 mei 2024
- 2 minuten om te lezen
In 2018, I created a cosplay of Cosette Fauchelevent from Les Misérables. I chose to replicate the black dress that, back then, was commonly seen in West End and European productions. To cater to different interests, I’ve divided this post into two parts: one focusing on the dress and the other on the bonnet.
I hope you find this post helpful and enjoy following along with the process.
This post will show you how I made the bonnet. The post about making the dress can be found here: https://spoekscosplay.wixsite.com/spoeks/post/cosette-part-1-the-dress


I bought a beige/pinkish straw hat wich i’ll use as a basis to make the bonnet.
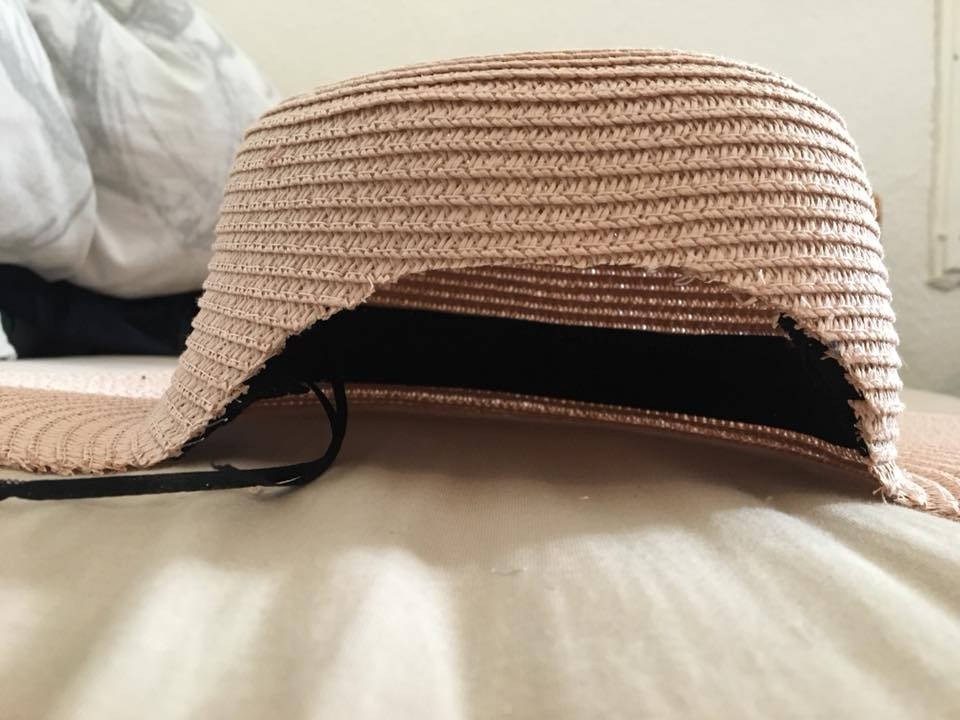

You will then cut off some pieces to get it shaped like the pictures above.

To prefent the edges from fraying I sewed on a strip of fabric, biaistape would also work very well for this! :) This could also be done at the end of the project.

I ironed the straw hat on medium heat for a short while. I think this was to give it some shape, but in all honesty, it has been 6 years since I made this and I do not fully remember why I did this step.

I wanted to spray paint the outside of the bonnet black, but the paint was visible on the ‘inside’ (I tested it on the back, the part that won’t be visible since it will be against my head). So i drew a pattern so i could use fabric to cover the bonnet. I layed newspapers on top of the hat to trace it.

Don't forget to add your seam allowance when you cut out the fabric!

Behold my sewing skills from way back in 2018. But the seams don't have to be pretty. They will be hidden in the bonnet anyway. However, to prevent the fabrics from fraying at the edge it is important that you add a hem.

Then you'll start sewing the fabric pieces together. For the pink 1820/1830s bonnet that i made last year I did this with my sewing machine. But back in 2018 when I made Cosette's bonnet, i sewed the pieces by hand because that give me more control. Both options are valid and fine! Just use the method that you are most comfortable with.

Then, when all fabric pieces are sewn together, you can pin and sew it to the base bonnet.
Again: it's up to you wheter you do this by hand or by machine.

I added the ribbon and I’m folding the hat in the correct shape. I’m sewing the sides together to hold that shape. If You’re already happy with the shape you can skip that part.
You can also add some wire to the brim for extra shaping controll.


Hand sew (or glue) the flowers and the ribbon to the inside and the outside. You can buy or make those yourself. Then add the closure for the neck ribbon (I used velcro but there are plenty of other options too, like snaps). And then you are finished! Good luck and have fun making your own straw hat bonnet!


Opmerkingen